

Saya is the Japanese word for a wooden knife sheath. Because of the different lengths, profiles, and spine thicknesses of Japanese kitchen knives, it is extremely hard for saya manufacturers to tailor made an exact saya for a marker’s knife, especially if the knife maker has a relatively low production.
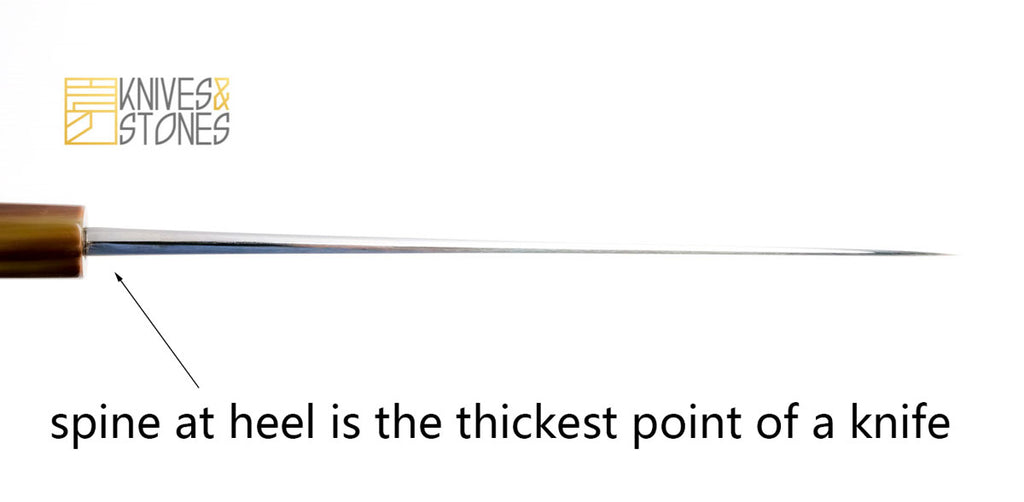
Ideally, the internal cavity of the saya should be just right and there is just the right friction between the saya and the knife’s spine at the heel, resulting in a “self-locking” state when knife is fully inserted into the saya. This is called “friction fit”.
Saya manufactures usually make saya in a more generic profile and sometimes the saya won’t be as nice fitting as we wish: the are not friction fit and require a saya pin to stop the knife from falling out.
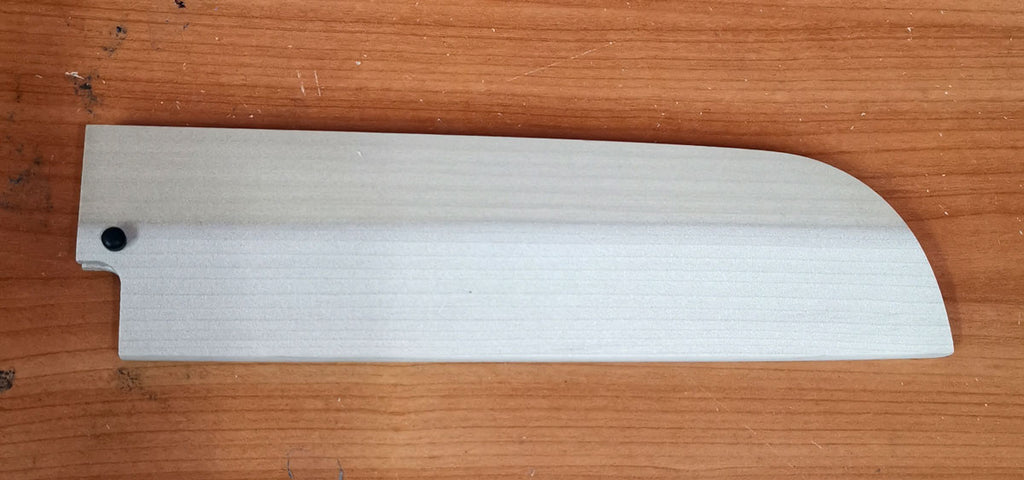 (A generic saya with a pin to stop the knife from falling out)
How do you “friction-fit” a saya if it is too loose?
Answer: use a small piece of wooden shim; place it between the knife and saya, right around the spine above heel (the thickest part of a knife).
Material:
- A chisel
- Soft wood (cedar, pine, magnolia, and alike) off cut
- Sandpaper (150-240 grit)
- contact glue / wood glue / expoxy. No CA glue as it drys too fast.
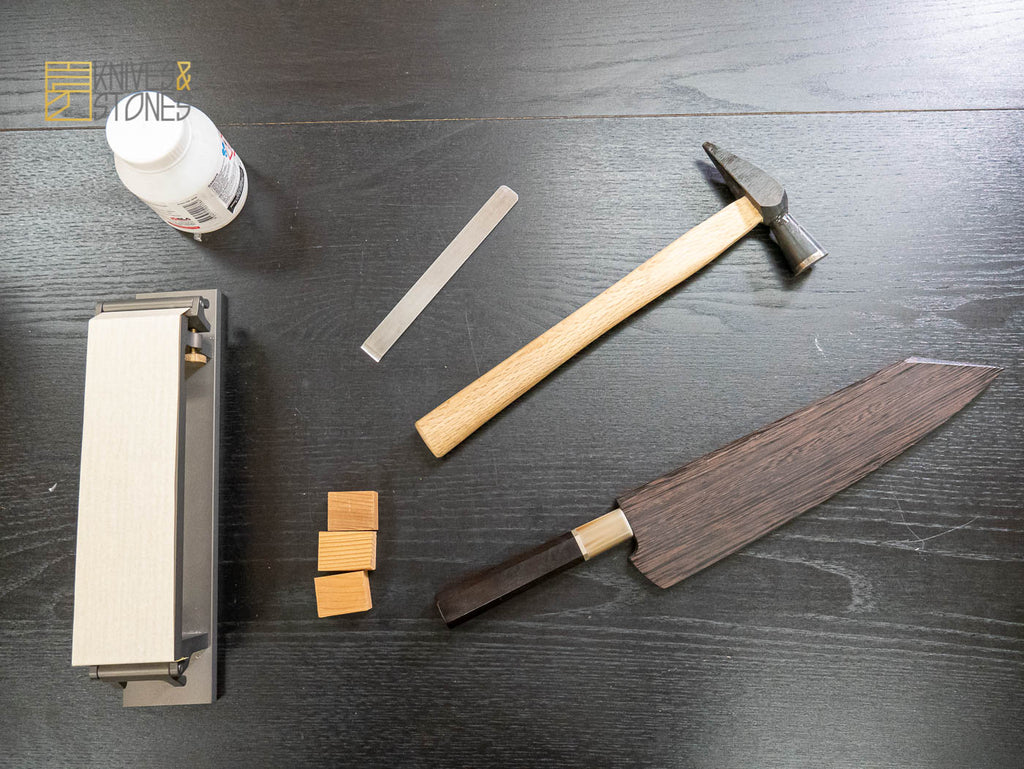
(Tools required)
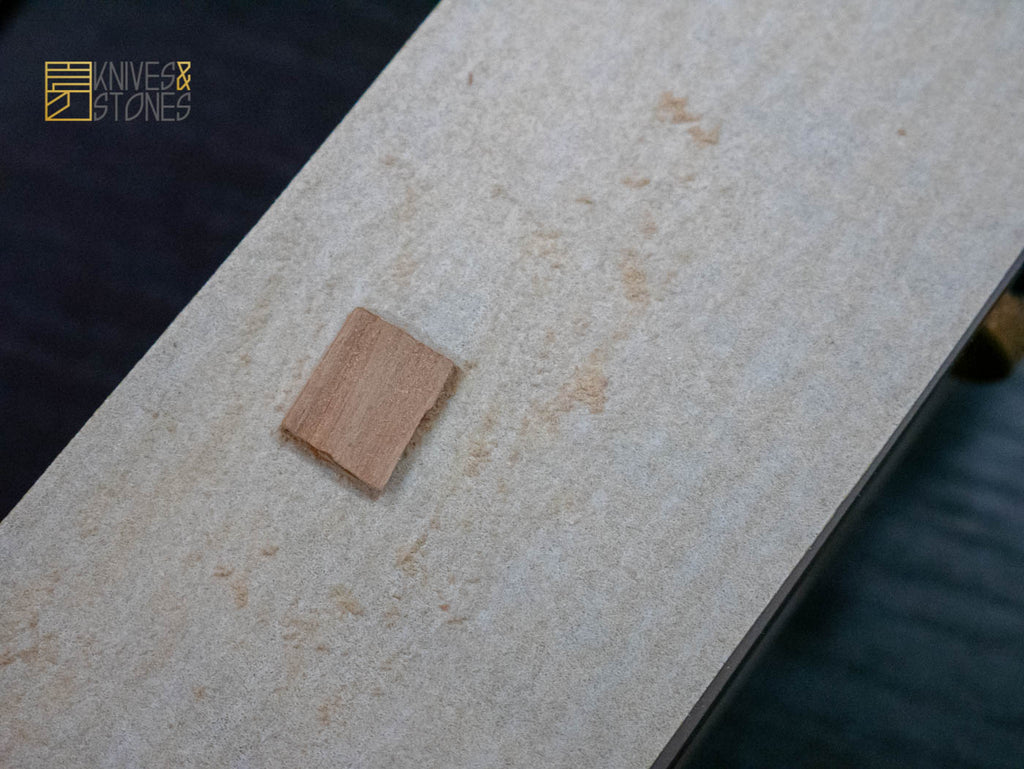
Step 1: make a piece of shim out of the wood, thickness depends on the gap between the knife and the saya. Test fit. The size of the shim could be somewhere between 10mm x 5mm to 10mm x 10mm.
* Note: please leave enough “meat” on the shim, accounting for a bit of sanding next.
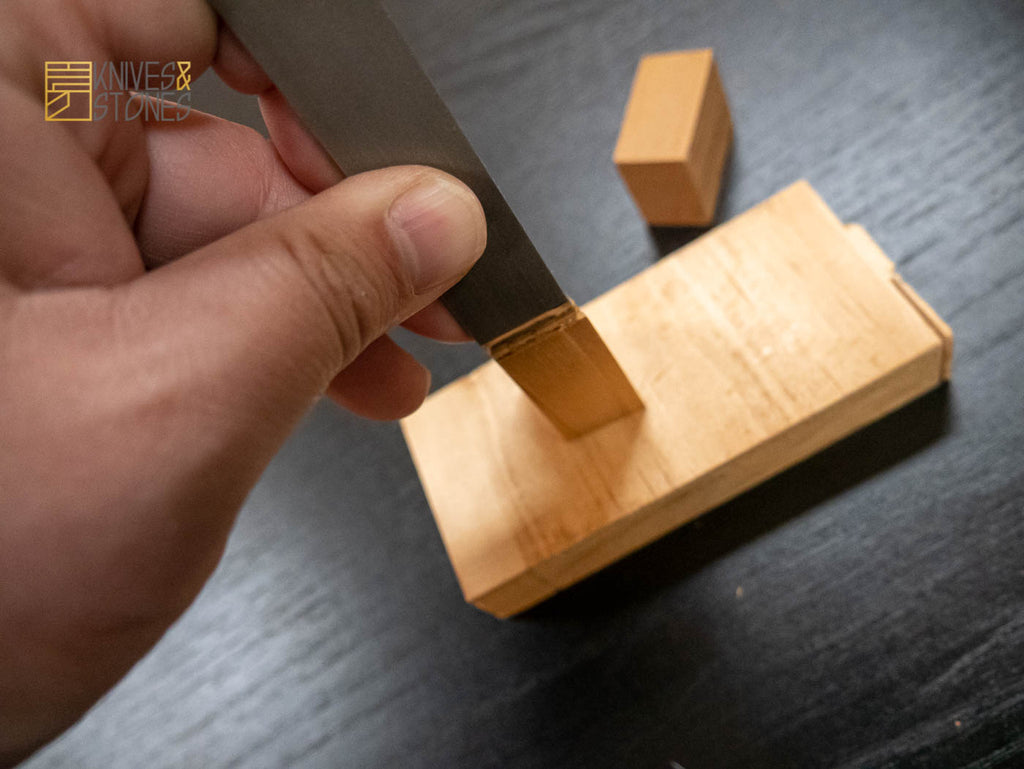 (Use chisel and hammer to make a few pieces of shims)
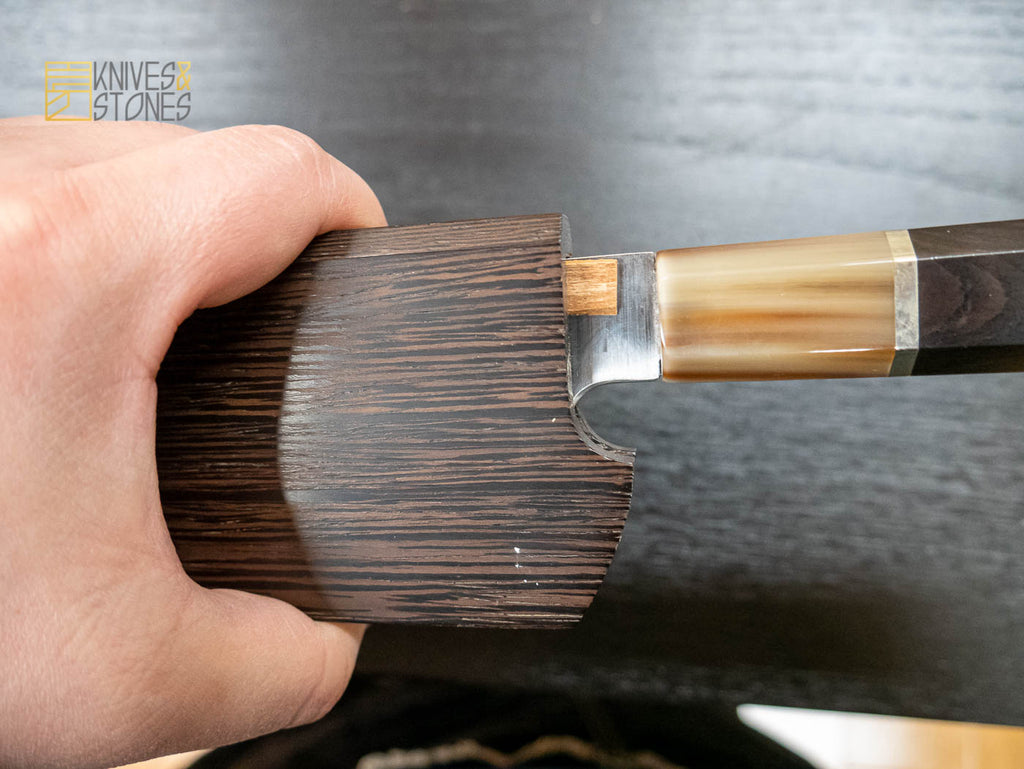
(Test fit the shim until you find the most suitable piece)
Step 2: Once you get the right piece of shim, sand the face and round the edges / corners to make sure the shim will not scratch the knife surface.
 (Sand the shim, round the edges and corners)
Step 3: Test fit again and once you are happy with the result, glue the shim on to the saya wall.
Optional step: You can dye the shim so that it looks more integrated with the saya.
Whoa, now you have a friction fit saya!
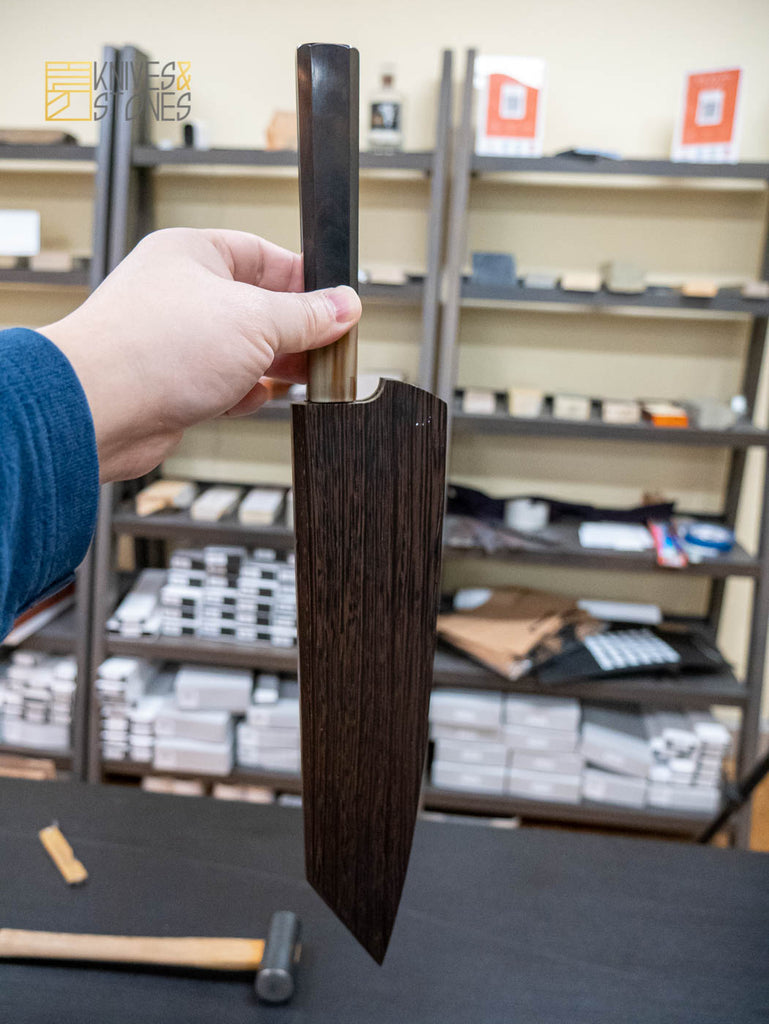
(Friction-fitted saya in no time)